What is MagicFace V3?
MagicFace V3 allows you to generate realistic portraits of anyone using a prompt in any style. If you have used various tools to create consistent characters, you will definitely love the results produced by MagicFace. One of the best features of this tool is that you can upload a face set to achieve highly detailed and realistic facial features.
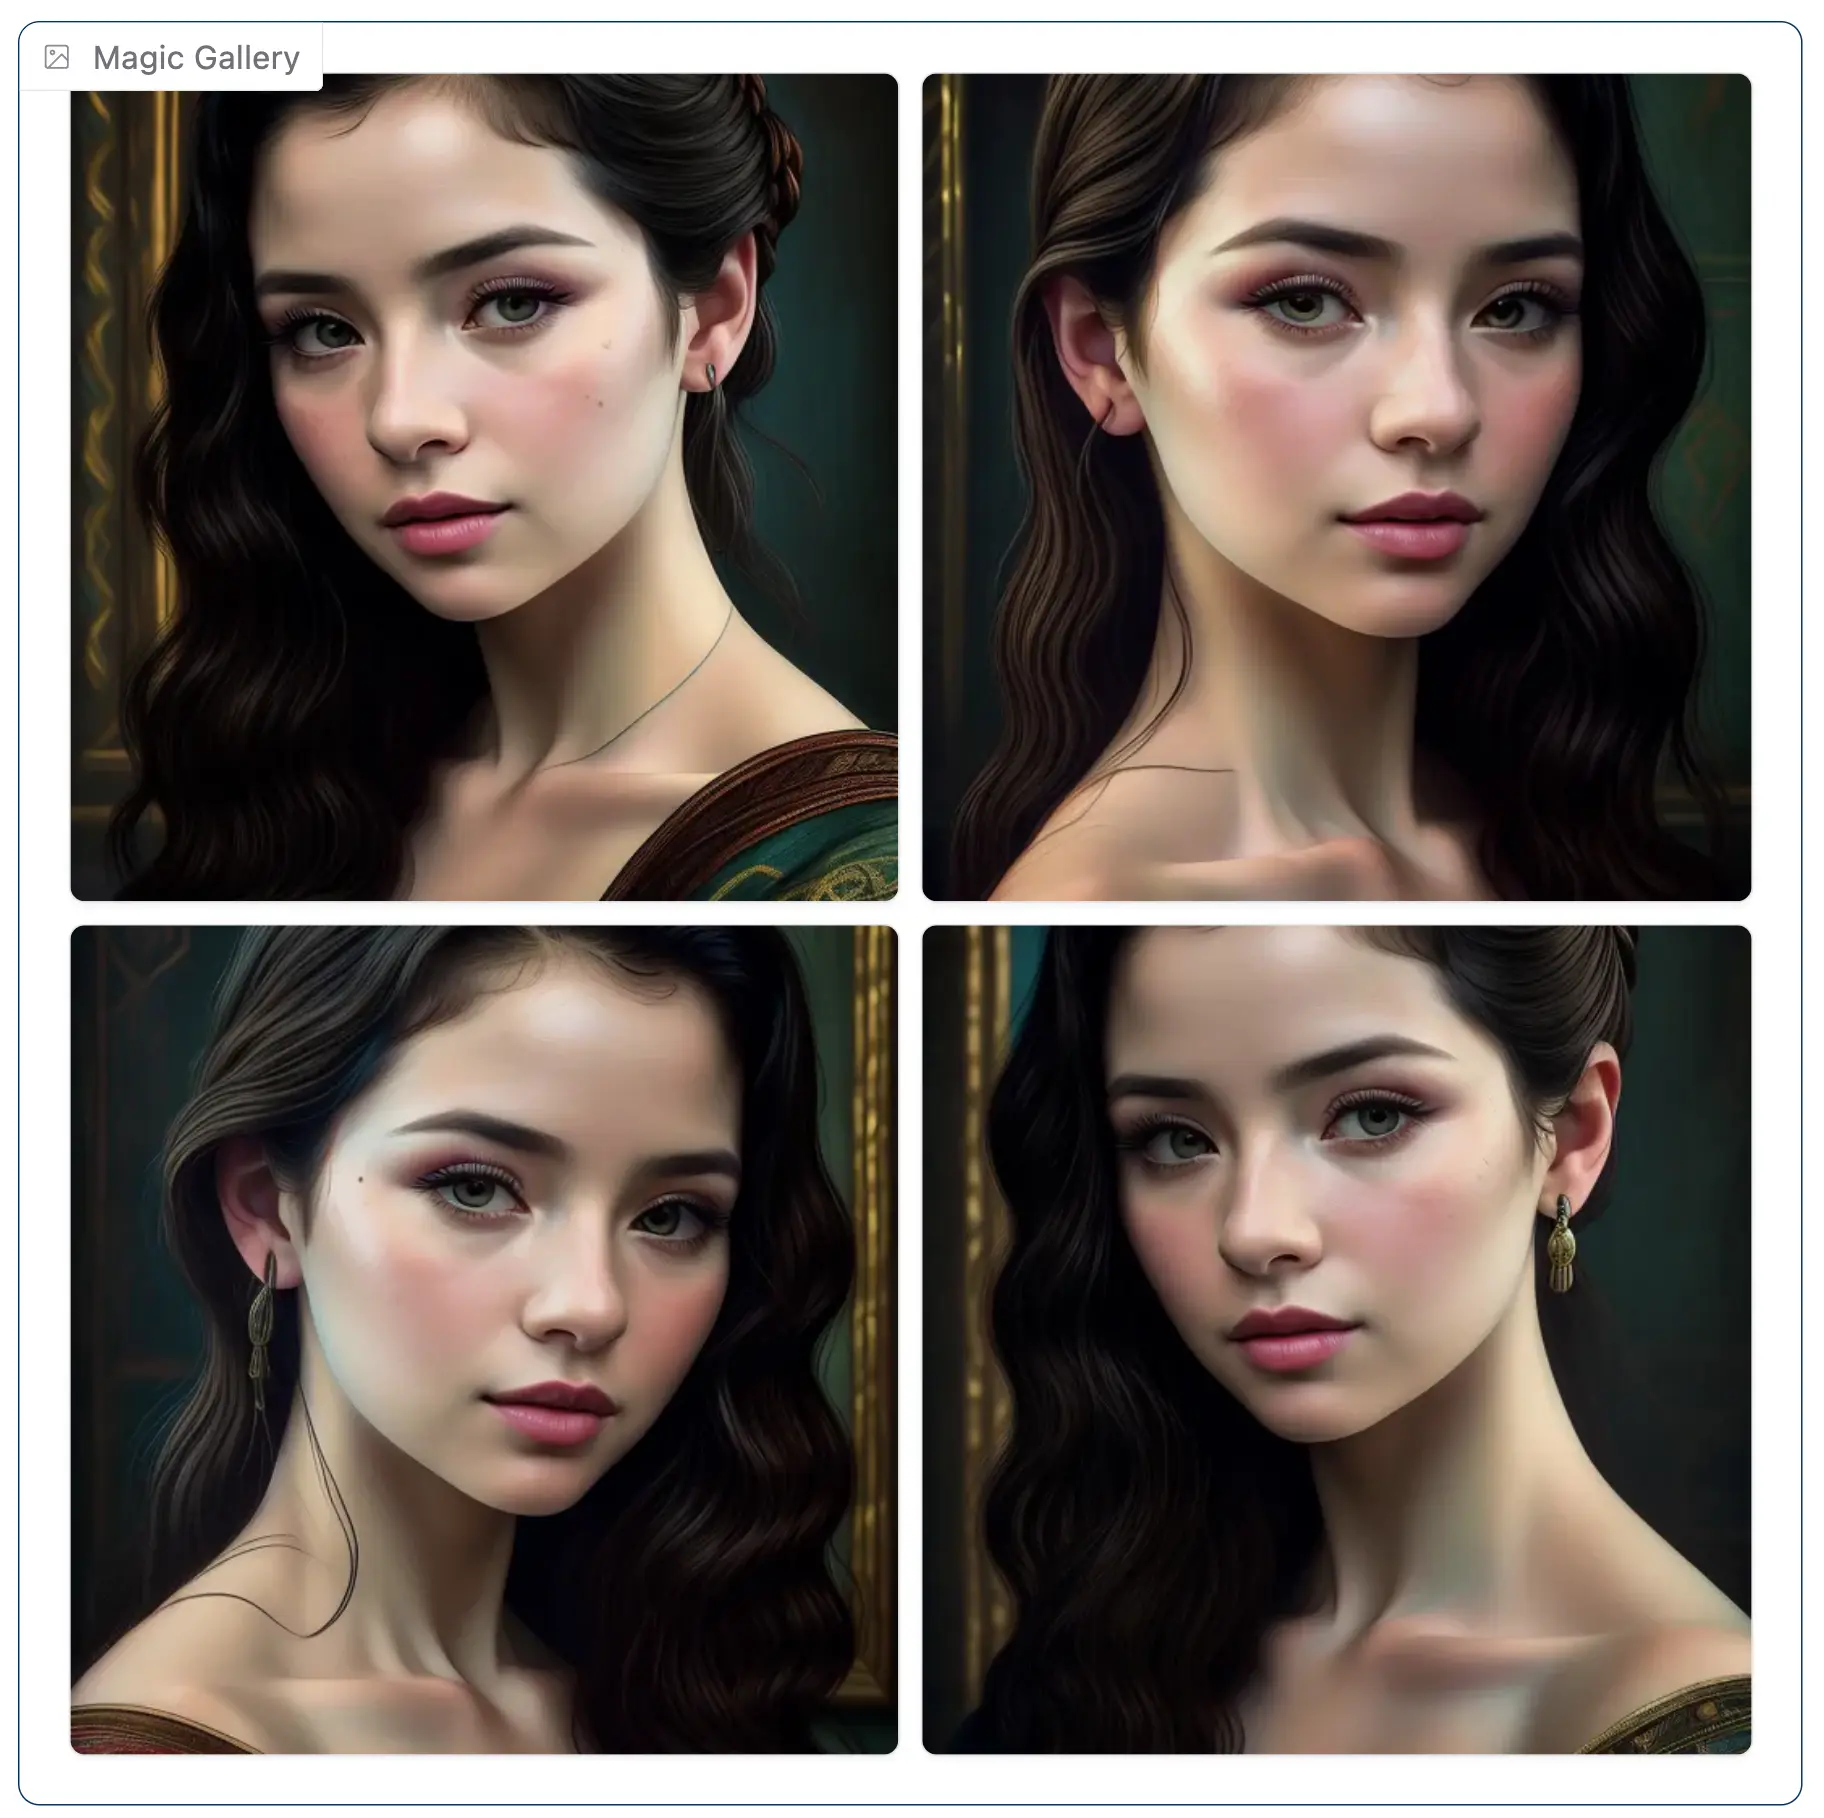
Generated by MagicFace V3
Another great aspect of MagicFace is its flexibility. You can use its Hugging Face demo version, run it on Google Colab, or install it locally on your system. In this guide, I will walk you through each method so you can start transforming images effortlessly.
Overview of MagicFace V3
| Feature | Description |
|---|---|
| AI Tool | MagicFace V3 AI |
| Category | Portrait Generation Framework |
| Function | Realistic Portrait Generation |
| Generation Speed | Efficient Processing |
| Research Paper | arxiv.org/html/2501.02260v1 |
| Demo Space | Hugging Face Space |
| Google Colab | Google Colab Link |
MagicFace V3: Transform Into Any Character with Consistent Photos
MagicFace V3 allows you to generate realistic portraits of anyone using a prompt in any style. If you have used various tools to create consistent characters, you will definitely love the results produced by MagicFace. One of the best features of this tool is that you can upload a face set to achieve highly detailed and realistic facial features.
Another great aspect of MagicFace is its flexibility. You can use its Hugging Face demo version, run it on Google Colab, or install it locally on your system. In this guide, I will walk you through each method so you can start transforming images effortlessly.
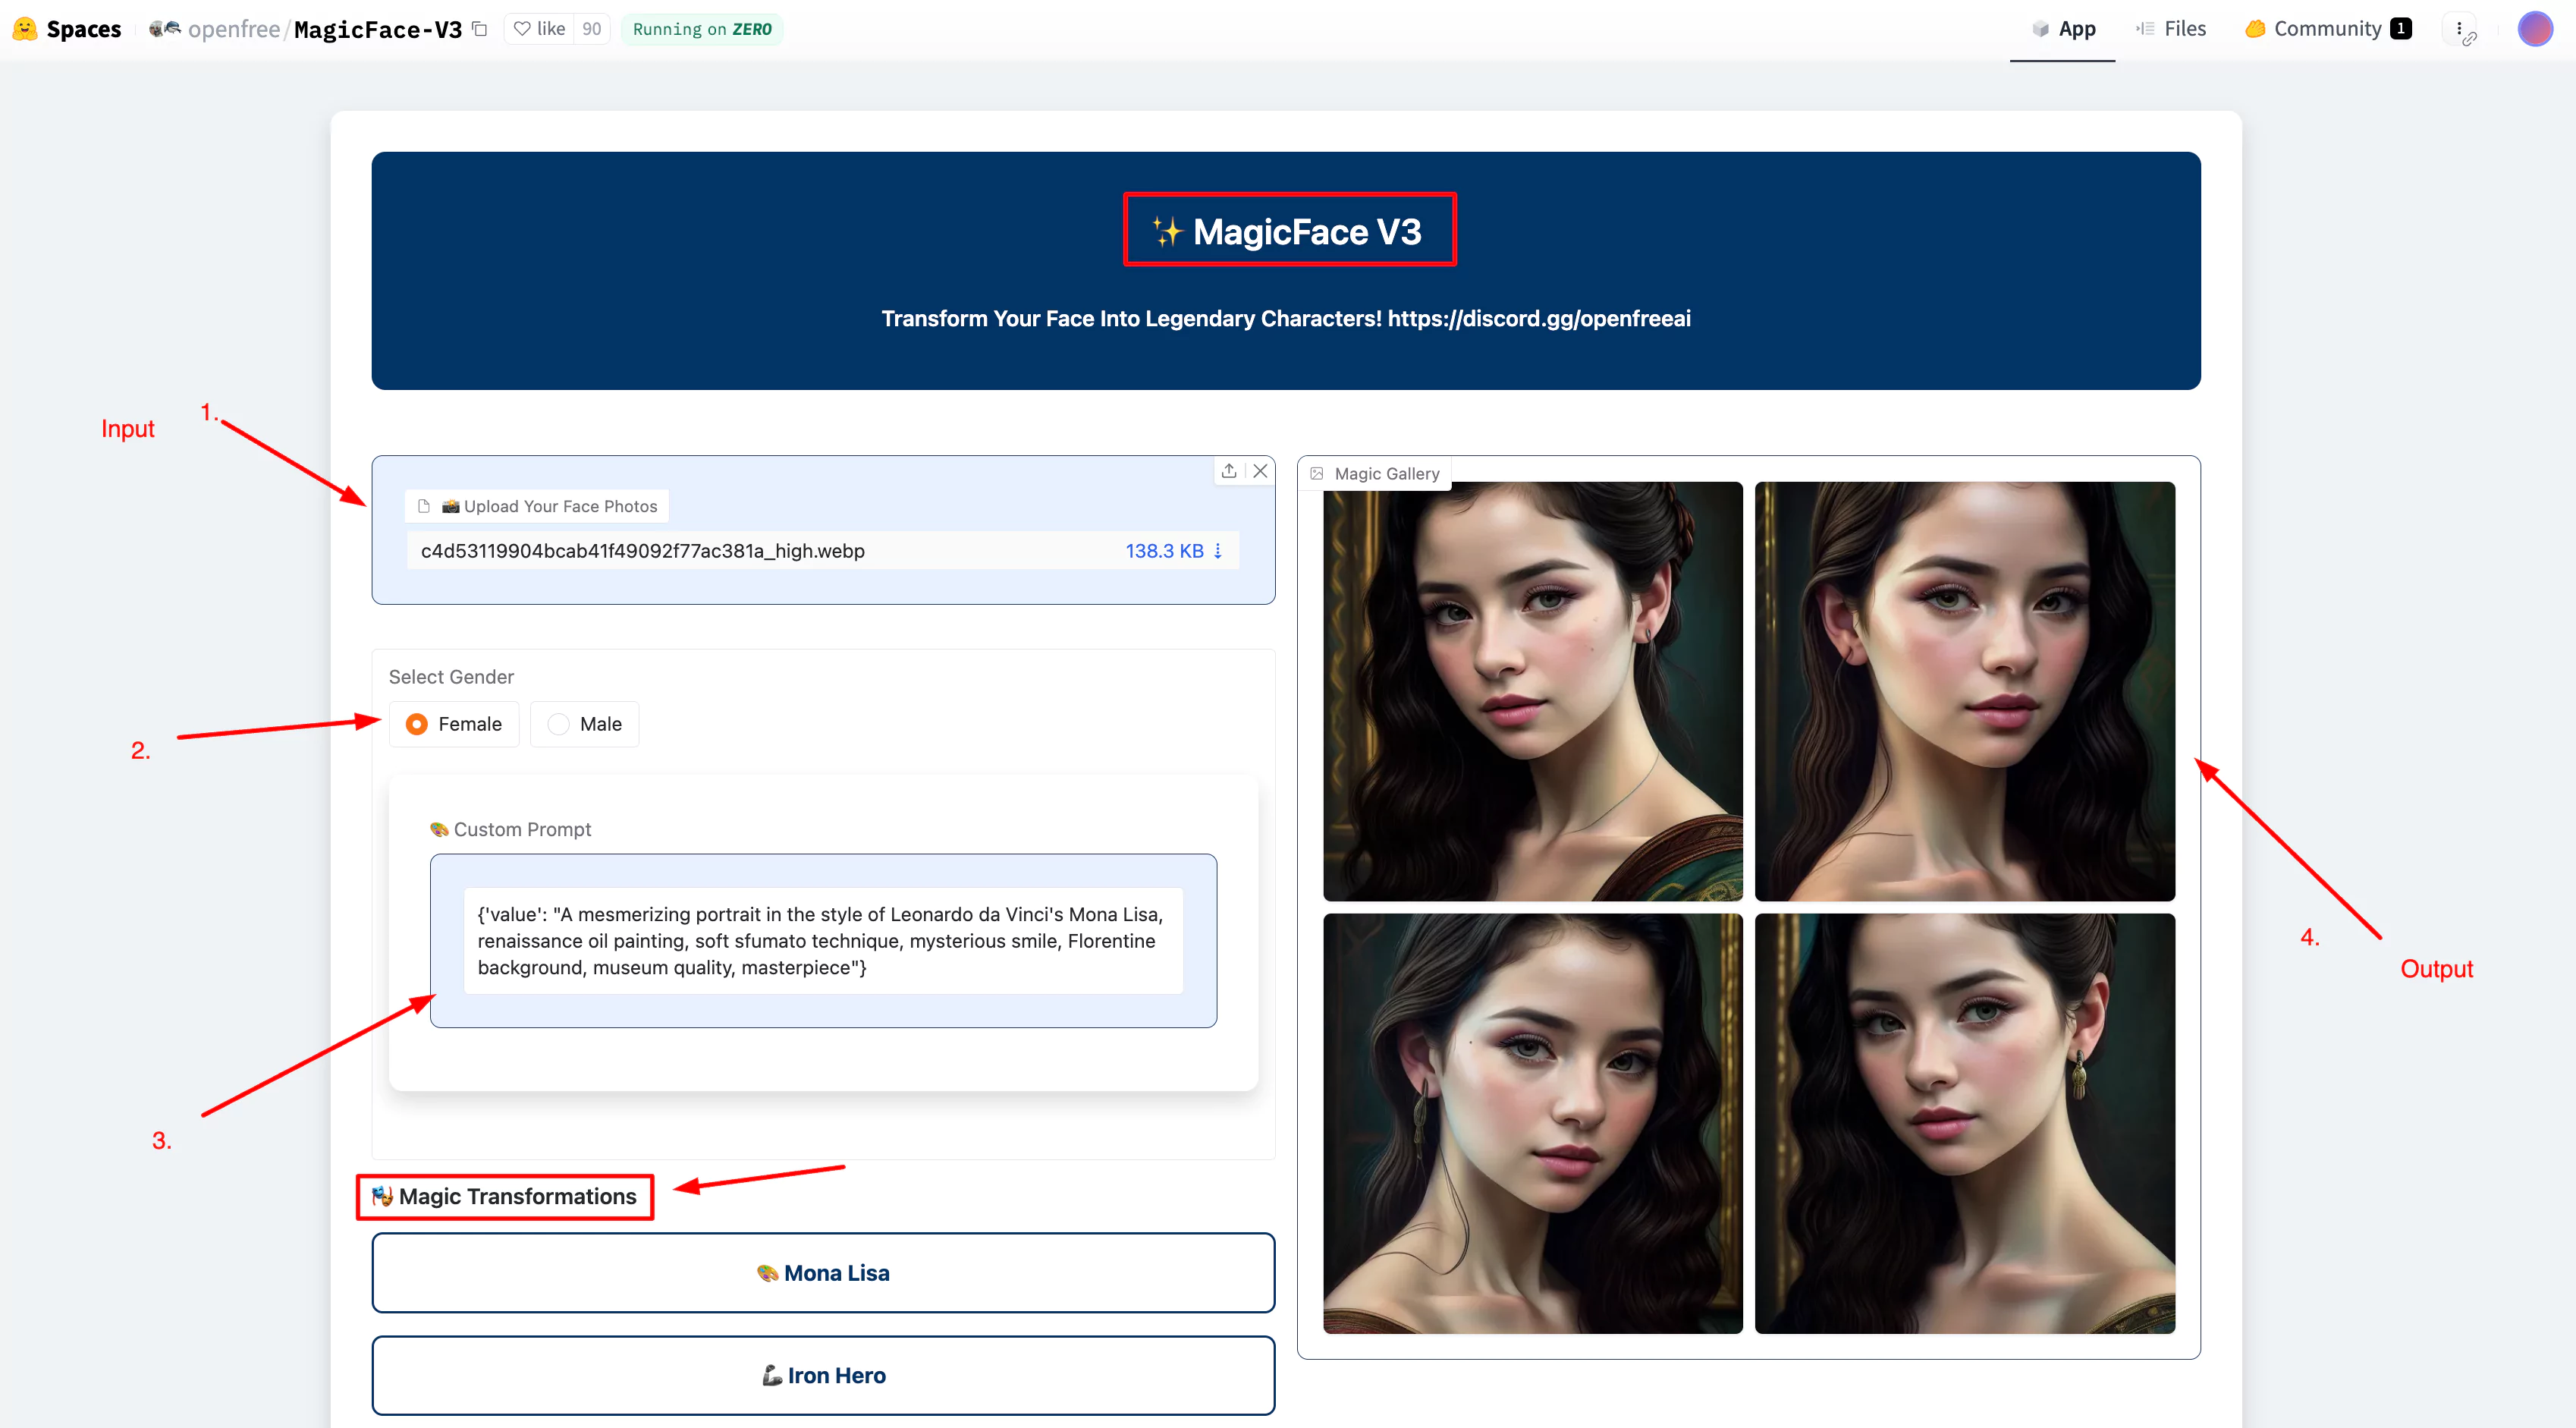
Using MagicFace for Image Generation
- Upload an image or a face set for better results.
- Select the correct gender.
- Enter a detailed prompt to describe the desired output.
- Click "Generate Magic."
- Wait for the transformation to complete and view your new portrait.
Key Features of MagicFace V3
Consistent Character Transformation
MagicFace V3 excels at maintaining the consistency of facial features across different images, ensuring a coherent character portrayal.
Detailed Prompt Customization
Allows for detailed prompts to guide the generation process, giving users control over the style and appearance of the transformed character.
Face Set Upload Capability
Users can upload a set of faces to achieve highly detailed and realistic transformations, enhancing the model's ability to produce accurate results.
Flexible Deployment Options
MagicFace V3 can be used via the Hugging Face demo, Google Colab, or installed locally, offering versatility to suit different user preferences.
Impressive Output Quality
The tool generates high-quality portraits that are impressive and realistic, making it a fantastic choice for character creation.
Ease of Use
MagicFace V3 is designed to be user-friendly, with a straightforward process for generating and refining portraits.


Pros and Cons
Pros
- Generates realistic portraits with detailed facial features
- Flexible usage options: Hugging Face demo, Google Colab, or local installation
- Consistent character creation with face set uploads
- Supports a variety of styles through detailed prompts
- Easy to use with a straightforward interface
Cons
- Requires a good quality face set for best results
- Initial setup can be complex for local installations
- Performance may vary based on system specifications
- Limited by the quality of the input images
How to Use MagicFace V3 AI?
Using the Hugging Face Demo Version
- Step 1: Access the Demo Version - Click on the Hugging Face link provided in the description. This will take you to the MagicFace demo page.
- Step 2: Upload a Face Set - Upload one or multiple pictures of the same face. This helps the model maintain consistency in facial features.
- Step 3: Select Gender - Choose the correct gender. This step is crucial for achieving accurate results.
- Step 4: Enter a Prompt - Type a detailed prompt describing how you want the portrait to look, or select a character from the provided list.
- Step 5: Generate the Image - Click the "Generate Magic" button. MagicFace will process your request and create a stunning portrait. If you want to refine your results, check the tool's guide for additional tips.
Running MagicFace on Google Colab
- Step 1: Open Google Colab Link - Click on the Google Colab link provided in the description. This will open the MagicFace notebook.
- Step 2: Set Up the Environment - Click on "Runtime" and select "Change Runtime Type." Choose "GPU" if it is not already selected. Click "Save."
- Step 3: Connect to Runtime - Click on the "Connect" button to establish a connection.
- Step 4: Install Dependencies - Run the first installation cell. This will install all necessary dependencies.
- Step 5: Launch MagicFace - Run the main cell. The first-time execution will download the required models. Once the installation is complete, you will see a "Gradio URL." Click on this URL to open MagicFace in your browser.
- Step 6: Use MagicFace - Upload a face set or an image. Enter a detailed prompt. Click "Generate" to create your portrait.
The results are truly remarkable, making MagicFace a fantastic tool for character transformation.
Installing MagicFace Locally
- Step 1: Install Dependencies - Go to the Hugging Face demo page. You need the following software installed on your system:Python 3.10.11FFmpegand an Nvidia graphics card.
- Step 2: Clone the Repository - Click on the three dots in the Hugging Face repository and select "Clone." Copy the Git clone link. Open the folder where you want to install MagicFace. In the folder path, typecmdand press Enter to open the command prompt. Paste the Git clone command and press Enter to clone the repository.
- Step 3: Navigate to the Folder - Use thecdcommand to navigate inside the cloned folder.
- Step 4: Set Up a Virtual Environment - Run the following command to create a virtual environment:python -m venv venvActivate the virtual environment using the appropriate command for your OS.
- Step 5: Install PyTorch - Go to the official PyTorch website. Copy the installation command based on your CUDA version. Paste the command in the terminal and run it.
- Step 6: Install Requirements - Open therequirements.txtfile. Addgradioandspacesto the list. RemoveXFormersfrom the file. Save the file. Run the following command to install the dependencies:pip install -r requirements.txt
- Step 7: Run MagicFace - Execute the main script:python main.pyThe first-time execution will download the required models. Once completed, you will see a "Local URL." Copy and paste this URL into your web browser to launch MagicFace.
- Step 8: Create a Batch File for Easy Access - To simplify launching MagicFace in the future: Open Notepad. Type the following command:@echo off cd /d path_to_magicface venv\Scripts\activate python main.pySave the file asrun.batNow, you can launch MagicFace with just one click.